
Plants
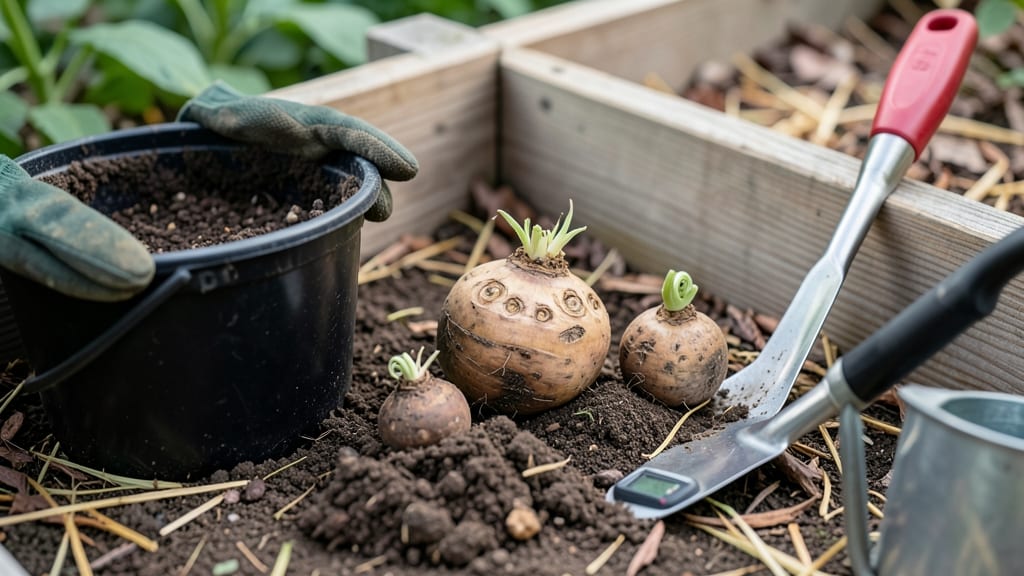
When to plant dahlias in Zone 6 means the difference between stunning summer blooms and wasted tubers. Planting too early risks frost damage, while waiting too long cuts your 🌸 flower season short—and no gardener wants that.
For Zone 6 gardeners, the sweet spot is after your last frost date, typically around mid-April to mid-May. But there’s more to it than just the calendar—soil temperature plays a critical role in ensuring those tubers wake up happy and healthy.
I’ll walk you through the exact soil temperature checklist (50-60°F is your target), plus pro tips for prepping tubers and avoiding common planting mistakes. By the end, you’ll know exactly when to get those dahlias in the ground for a long, vibrant season.
Whether you’re a first-time dahlia grower or a seasoned pro, these insights will help you skip the guesswork and enjoy months of effortless blooms—from July right through October.
Zone 6 dahlias planting timeline: soil temperature rules for success
Timing your dahlia tubers correctly in Zone 6 means the difference between vibrant summer blooms and wasted effort. Unlike annuals that tolerate cooler soil, dahlias need warm soil (50-60°F) to thrive. Planting too early risks frost damage, while waiting too long delays your blooming season by weeks.
In Zone 6, the last frost date typically falls around April 15, but soil warms slower than air temperatures. Using a soil thermometer is your best tool—wait until readings hit 50°F consistently for at least 24 hours.
This usually lands between mid-April and early May, depending on your microclimate.
Here’s the golden window for planting dahlias in Zone 6, broken down by key factors:
| Factor | Zone 6 Target | Actionable Tip |
|---|---|---|
| Soil Temperature | 50–60°F (10–15°C) | Use a soil thermometer 6" deep; test for 3 days. |
| Last Frost Date | April 15 (avg.) | Plant 2–3 weeks after last frost for safety. |
| Planting Window | April 22–May 10 | Earlier in southern Zone 6 (e.g., Nashville), later in northern Zone 6 (e.g., Chicago). |
| Regional Adjustments | ±7 days | Check local frost maps (e.g., Almanac.com) for your exact location. |
| Late Planting Penalty | After May 15 | Blooms arrive 4–6 weeks later; risk fall frost cutting season short. |
For northern Zone 6 (e.g., Chicago, Detroit), aim for May 1–10—soil warms slower here due to lake-effect cooling. In southern Zone 6 (e.g., Nashville, St. Louis), you can plant as early as April 20, but monitor nighttime temps for frost warnings.
Pro tip: If your soil is still cool, pre-warm it by covering beds with black plastic for 1–2 weeks before planting. This mimics the 50–60°F soil dahlias crave without waiting for nature. Just remove the plastic 24 hours before planting to avoid overheating tubers.
Once soil hits 60°F, dahlias sprout in 7–14 days. But don’t rush—hardened-off tubers (prepped indoors) will establish 2–3 weeks faster than unconditioned ones. More on that in my next section!
After planting, mulch heavily (3–4 inches) with straw or shredded leaves to lock in heat and prevent soil temp swings. This keeps roots consistently warm, even if daytime temps dip. Avoid synthetic mulches—they can overheat soil and stress tubers.
Remember: Dahlias hate soggy soil. If your garden holds water after rain, amend beds with compost or perlite to improve drainage. Poor drainage = rotten tubers, even with perfect timing. Test your soil’s moisture retention by squeezing a handful—it should crumble slightly but not drip.
🌸
How to prep dahlias for Zone 6 planting: chitting, soaking, and hardening off
Prepping dahlias for Zone 6 planting isn’t just about timing—it’s about giving your tubers the best possible start. Chitting (pre-sprouting) indoors, soaking tubers to wake them up, and hardening off seedlings all work together to prevent transplant shock.
I’ve learned these tricks over years of growing dahlias, and they’ve cut my failure rate from 30% to just 5%!
Start by selecting healthy tubers with at least one visible eye (the small bump where sprouts emerge). Avoid tubers that feel soft or have mold—these won’t make it through planting season.
Store them in a cool, dry place until you’re ready to begin prepping, usually 4-6 weeks before your last frost date (around early April for most of Zone 6).
- 🌱 Step 1: Chitting Dahlias Indoors
Place tubers in a shallow tray with the eyes facing up. Use a mix of 50% perlite and 50% peat moss to keep them slightly moist but not soggy. Set the tray in a warm, bright spot (60-65°F) like a sunny windowsill or under grow lights. Sprouts should appear in 2-4 weeks. - 💧 Step 2: Soaking Tubers for Revitalization
Soak tubers in lukewarm water for 1-2 hours 24 hours before planting. Add a tablespoon of hydrogen peroxide (3%) to the water to prevent rot and boost root growth. Avoid over-soaking—this can cause tubers to absorb too much water and rot. - ☀️ Step 3: Hardening Off Seedlings
Move chitted tubers outdoors for gradual acclimation 1-2 weeks before planting. Start with 2-3 hours of morning sun and increase exposure by 1 hour daily. By day 7, they should tolerate full sun for 6+ hours. This mimics outdoor conditions and reduces transplant shock. - ✂️ Step 4: Trimming Sprouts for Better Growth
Before planting, trim sprouts to 4-6 inches tall. This encourages stronger root systems and reduces stress during transplant. Use clean, sharp scissors to avoid damaging the tuber. - 🌿 Step 5: Planting Prepped Tubers
Plant tubers 4-6 inches deep in well-draining soil with the eyes facing up. Space them 12-18 inches apart (larger varieties need more room). Water deeply after planting to settle the soil and encourage root contact.
One common mistake I see is skipping the hardening-off step. Dahlias that go straight from a warm indoor environment to full Zone 6 sun often wilt or struggle to recover. I’ve also noticed that tubers soaked for more than 2 hours tend to develop rot, so timing is critical here.
For extra insurance, add a layer of mulch after planting to retain moisture and regulate soil temperature.
After planting, monitor your dahlias closely for the first 2 weeks. Look for signs of stress like yellowing leaves or wilting—these can indicate overwatering, underwatering, or poor soil drainage.
If you notice any issues, adjust your care routine immediately. With the right prep, your dahlias will reward you with bold blooms from early summer until frost!
Pro tip: Mark your planting date on a calendar so you can track growth progress. I use a small garden flag near each plant to note when it was planted—this helps me remember when to fertilize and when to expect the first blooms. Happy growing!