
Plants
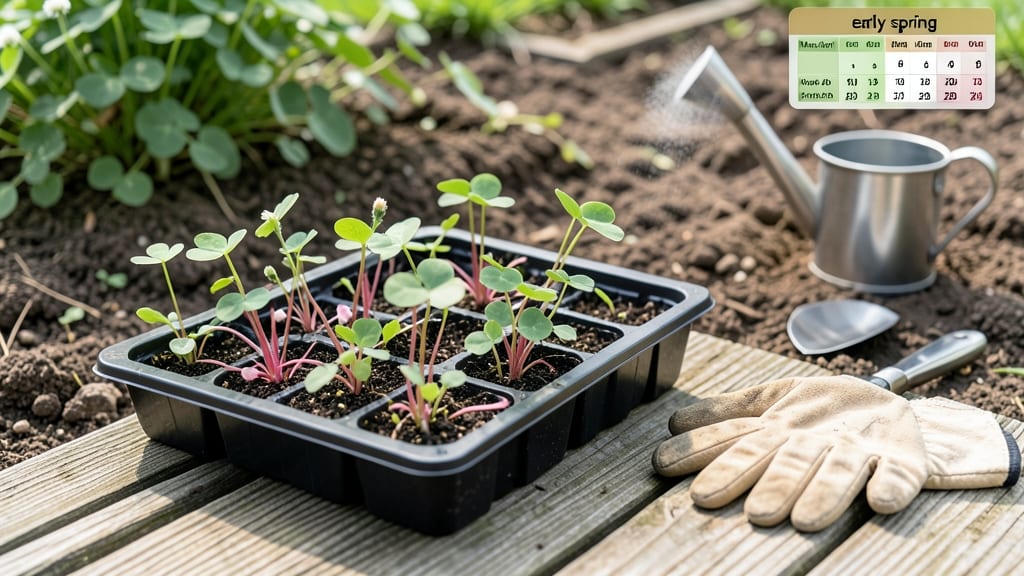
Planting clover at the right time in spring can transform your lawn into a lush, nitrogen-rich carpet—but get it wrong, and you might end up with patchy, struggling plants.
The key is understanding your local climate and soil conditions, especially if you're in USDA Zone 6a or similar areas where frost lingers.
Most gardeners aim for early to mid-spring, but timing depends on when your last frost date falls. For Zone 6a, that’s typically around mid-April, but coastal or high-altitude areas may need adjustments. Waiting too long risks weed competition, while planting too early exposes tender seedlings to frost damage.
I’ll break down the best planting windows, how to prep your soil, and even when to water for optimal growth. Whether you're sowing seeds directly or overseeding an existing lawn, these tips will help you avoid common mistakes and set your clover up for success.
Ready to grow a vibrant, low-maintenance lawn? Let’s dive into the exact steps to time your planting perfectly—so you can enjoy a thriving 🌱 clover patch all season long.
Optimal spring planting windows for clover by USDA hardiness zones
Getting your clover seeds in the ground at the right time ensures strong germination and a lush, nitrogen-rich lawn. Since clover thrives in cool to moderate temperatures, timing varies dramatically across USDA hardiness zones 3-10.
Coastal areas warm faster than inland zones, while high-altitude gardens may need adjustments too.
For most gardeners, the ideal window falls between 2-4 weeks after your last frost date, when soil temperatures reach at least 50°F (10°C). In colder zones, this could mean mid-April, while warmer zones might start as early as February.
Let’s break it down by region to avoid common mistakes like frost damage or weed competition.
🌱 PRO TIP: Use a soil thermometer to confirm readiness—clover seeds need warmth to sprout, but not scorching heat. Aim for 55-65°F (13-18°C) for best results.
| USDA Zone | Last Frost Date | Optimal Planting Window | Soil Temp Goal | Microclimate Notes |
|---|---|---|---|---|
| Zones 3-4 | Mid-to-late May | Late May - Early June | 50-55°F (10-13°C) | Inland areas: Wait for soil to warm. Coastal: Can plant 1-2 weeks earlier. |
| Zones 5-6 | Early-to-mid April | Mid-April - Early May | 55-60°F (13-16°C) | High-altitude: Delay until late May. Urban heat islands: Can plant earlier. |
| Zones 7-8 | Mid-to-late March | Early March - Mid-April | 60-65°F (16-18°C) | Coastal: Start in February. Inland: Wait for consistent 60°F nights. |
| Zones 9-10 | Late January - Early February | February - Early March | 65-70°F (18-21°C) | Desert areas: Plant with extra mulch. Humid zones: Avoid waterlogged soil. |
In Zones 3-4, where frosts linger into June, patience is key. Planting too early risks seed rot or frost heave, while waiting until June ensures your clover establishes before summer heat arrives. For these colder climates, consider a lightweight row cover to protect young seedlings.
Gardeners in Zones 5-6 have the most flexibility, with a 6-week window to plant. This range accommodates both early bloomers (like white Dutch clover) and late-starting varieties. If your spring is unpredictable, opt for a mixed clover blend to hedge your bets.
Warmer zones (7-10) can start earlier, but beware of summer dormancy if planted too late. In Zone 9-10, clover may bolt prematurely if stressed by heat, so prioritize shade cloth or drip irrigation to maintain even moisture.
For coastal gardeners, adjust timelines by 1-2 weeks earlier than inland zones due to milder winters. In contrast, high-altitude gardens (e.g., mountainous regions in Zone 6) may need to delay planting until late May to avoid late frosts.
Always test your soil pH before planting—clover prefers 6.0-7.0. If your soil is too acidic, amend with lime 4-6 weeks before seeding. A soil test kit (available at garden centers) makes this easy and ensures your clover thrives from day one.
Finally, remember that microclimates matter. A south-facing slope warms faster than a north-facing yard, and urban areas can be 5-10°F warmer than rural zones. Use these guidelines as a starting point, then observe your local weather patterns for the most successful clover planting.
With the right timing, your clover will establish quickly, outcompete weeds, and provide years of nitrogen-rich growth—all while adding beauty to your landscape. Happy planting! 🌿
How to adjust planting time for your local microclimate
Your local microclimate can dramatically shift the ideal clover planting window. Urban heat islands may warm up faster than rural areas, while high-altitude gardens often face delayed springs. Even neighboring yards can have different conditions—so don’t rely on generic planting charts.
Adjusting your timing based on soil temperature, frost risk, and local weather patterns ensures your clover thrives from the start.
Start by testing your soil temperature—clover germinates best when soil reaches 50°F (10°C). Use a soil thermometer or the "finger test": press your finger into the soil 1 inch deep. If it feels cool but not freezing, it’s likely ready.
In urban areas, pavement and buildings can create microclimates that warm up 1-2 weeks earlier than surrounding rural zones, so plant slightly sooner if you’re in a city.
For high-altitude gardens (above 5,000 feet), expect a shorter growing season and cooler soils. Aim to plant 2-3 weeks later than your regional average to avoid frost damage. Monitor local frost dates—plant after the last expected frost, but leave a buffer of 2-3 weeks for slow soil warming.
If your area has unpredictable spring weather, opt for a late-March to early-April planting window for flexibility.
- 1 Test soil temperature with a thermometer or finger test—wait until it reaches 50°F (10°C) for germination.
- 2 Adjust for urban heat: Plant 1-2 weeks earlier in cities where pavement retains heat.
- 3 Delay in high altitudes: Plant 2-3 weeks later if above 5,000 feet to avoid frost.
- 4 Use mulch to regulate soil temperature—apply 1-2 inches of straw after planting.
- 5 Monitor local frost dates—plant after the last frost but leave a 2-week buffer for safety.
If your spring weather is unpredictable, consider a two-stage planting approach. Sow half your seeds at your calculated ideal time, then plant the remaining 1-2 weeks later. This hedges against late frosts or cool snaps.
For urban gardens, also watch for heat spikes—if temperatures exceed 85°F (29°C) before germination, provide afternoon shade with lightweight row covers or temporary shade cloth.
After planting, use mulch to stabilize soil temperature and retain moisture. Apply 1-2 inches of straw or shredded leaves—this helps clover establish roots faster in variable conditions.
If you’re in a dry climate, water deeply 2-3 times per week until germination (about 2-3 weeksoverwatering can suffocate seeds, while underwatering stresses young plants.
Finally, keep an eye on your clover’s progress. If it germinates unevenly, it may signal inconsistent soil moisture or temperature. In such cases, thin seedlings to 1 inch apart and monitor for pests like slugs, which thrive in damp, cool conditions.
With these adjustments, your clover will establish a dense, nitrogen-rich cover regardless of your local microclimate quirks. 🌱